This guide will explain how to set up an appointment type booking using Booking Commerce, a SAAS-based online booking and appointment scheduling software.
To start an online booking system for fitness classes, residential & commercial cleaning, dentist booking, you need to configure the appointment type booking via Booking Commerce.
Let’s go through the complete guide to set up an appointment-type booking system.
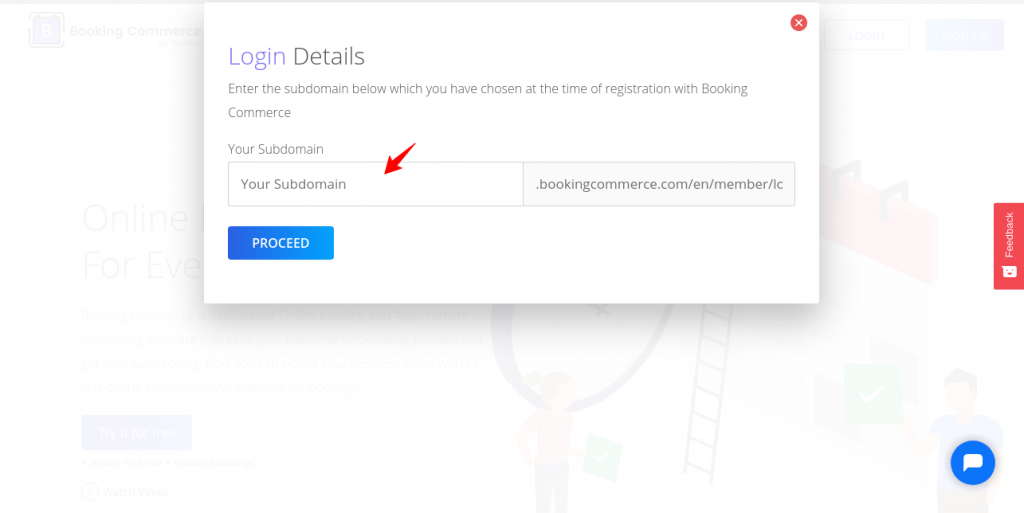
STEP 1: Log in to the Booking Commerce panel OR Get Registered
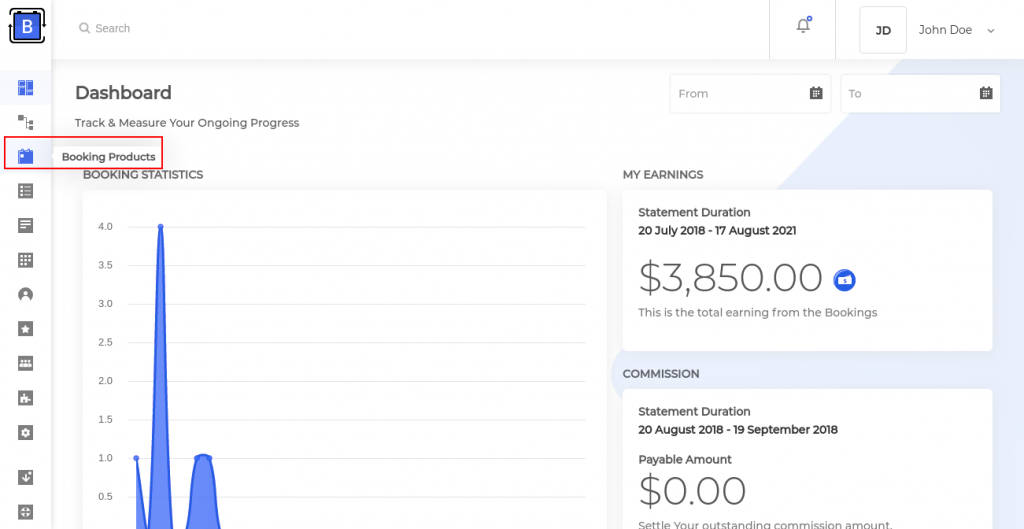
STEP 2: Click the Booking Products menu icon & proceed to add a new booking product/service.
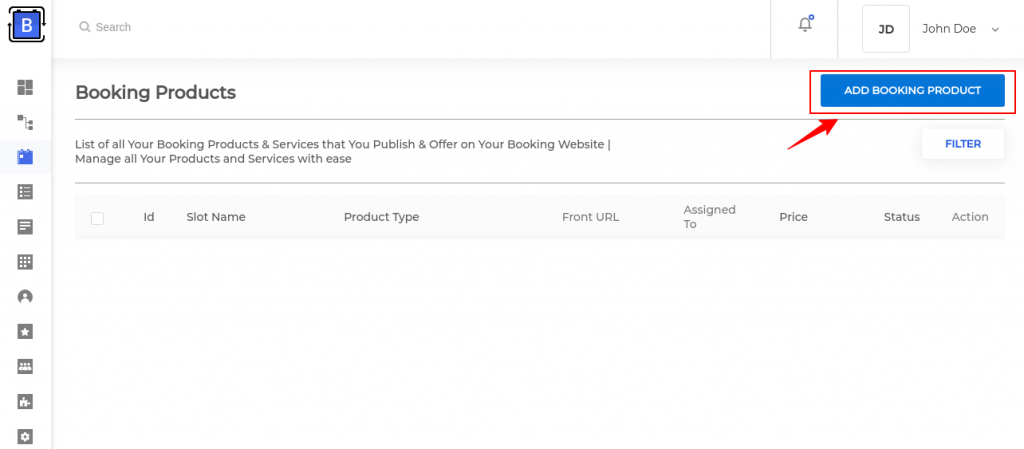
3RD STEP: Enter the required details related to your booking product.
STEP 4: Enter the following details:
Product Information: You need to enter the booking product title, description, choose booking categories, upload images, enter slot price, and more.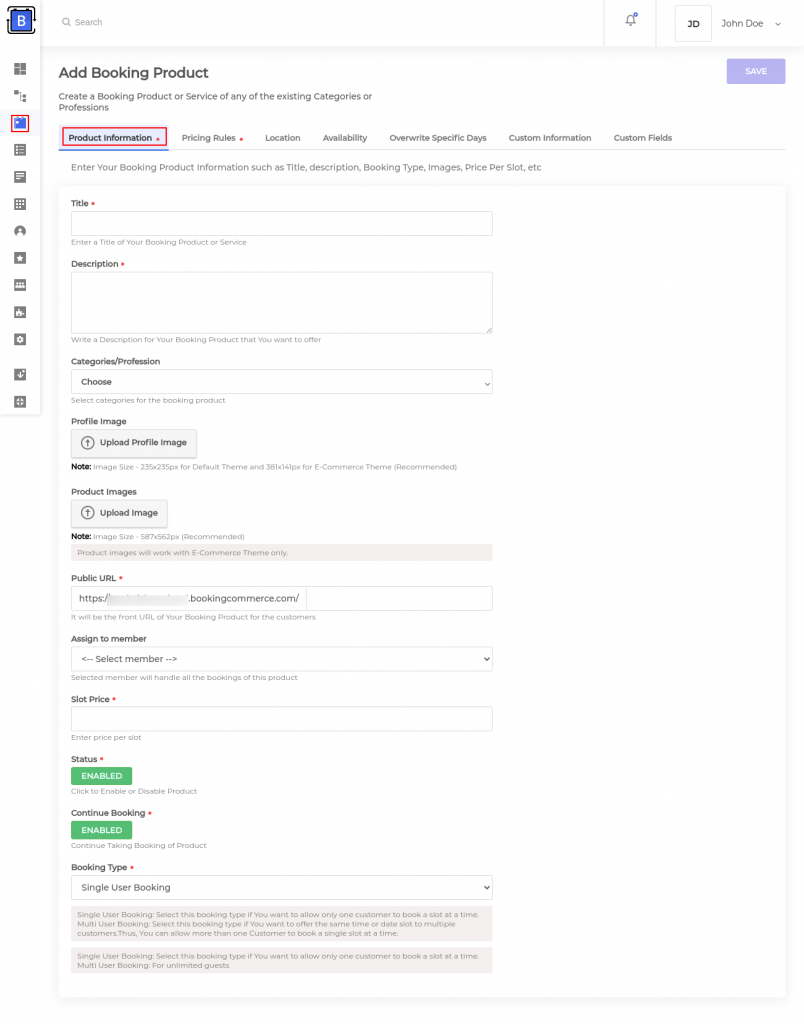
How to Create Booking Product/Service Categories?
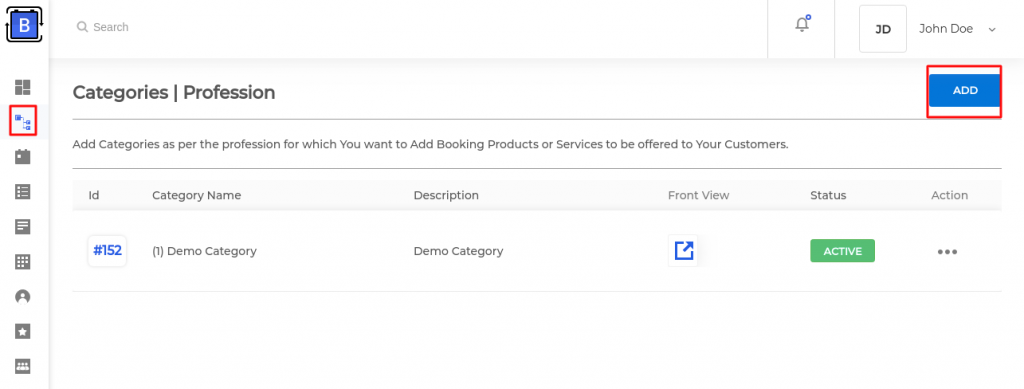
Booking Commerce allows you to create categories as per the profession. To add a category,
- Visit categories on the left-hand side of the menu.
- Click Add to create a new category.
- Next, fill up the details regarding the category, add up the category image and banner image if using an e-commerce theme and then save it.
Now when you are creating a new product you need to choose the category and assign the booking product in that category.
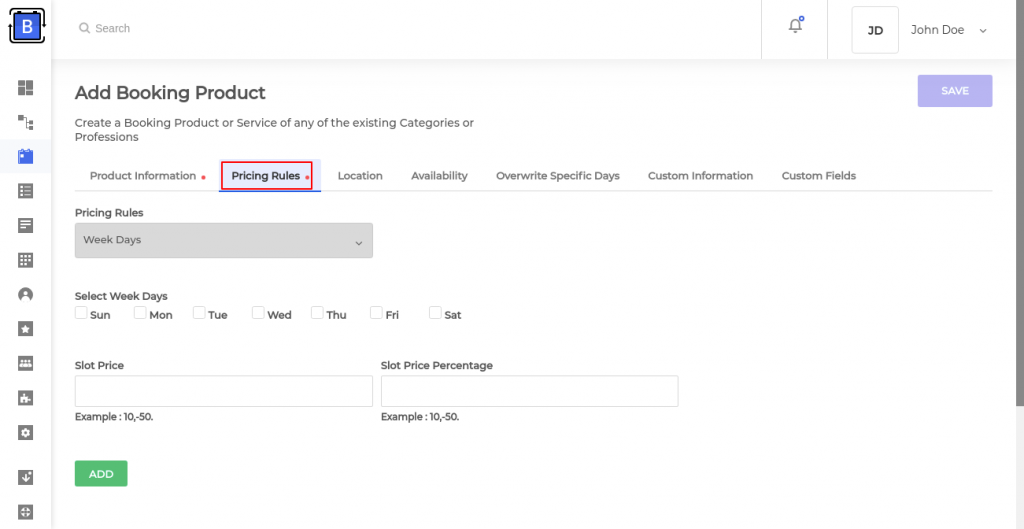
Price Rule: Every booking product you offer need not have the same price for each customer every single day.
Through Booking Commerce, you can set price rules on products based on which price will be calculated on each booking.
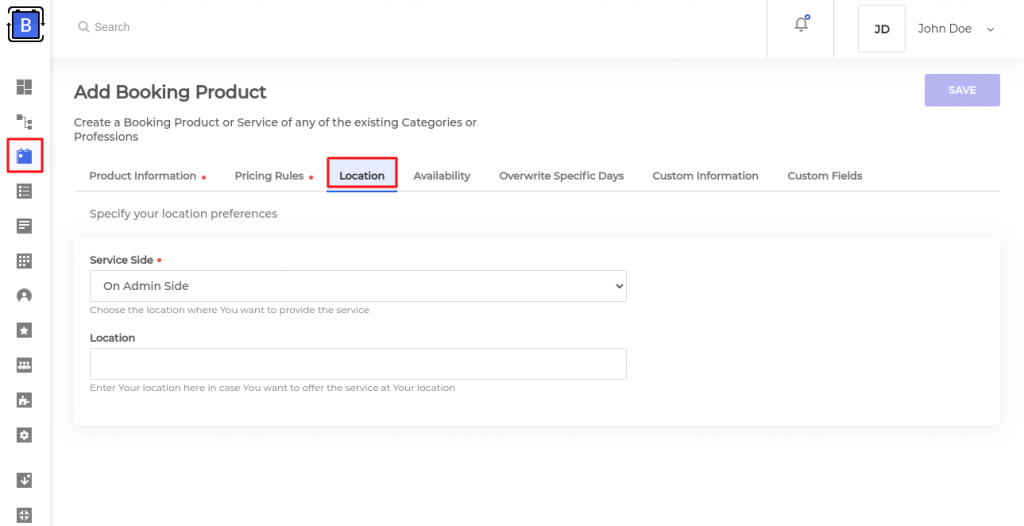
Location: Enter whether the service is provided at your’s location or at the customer’s location.
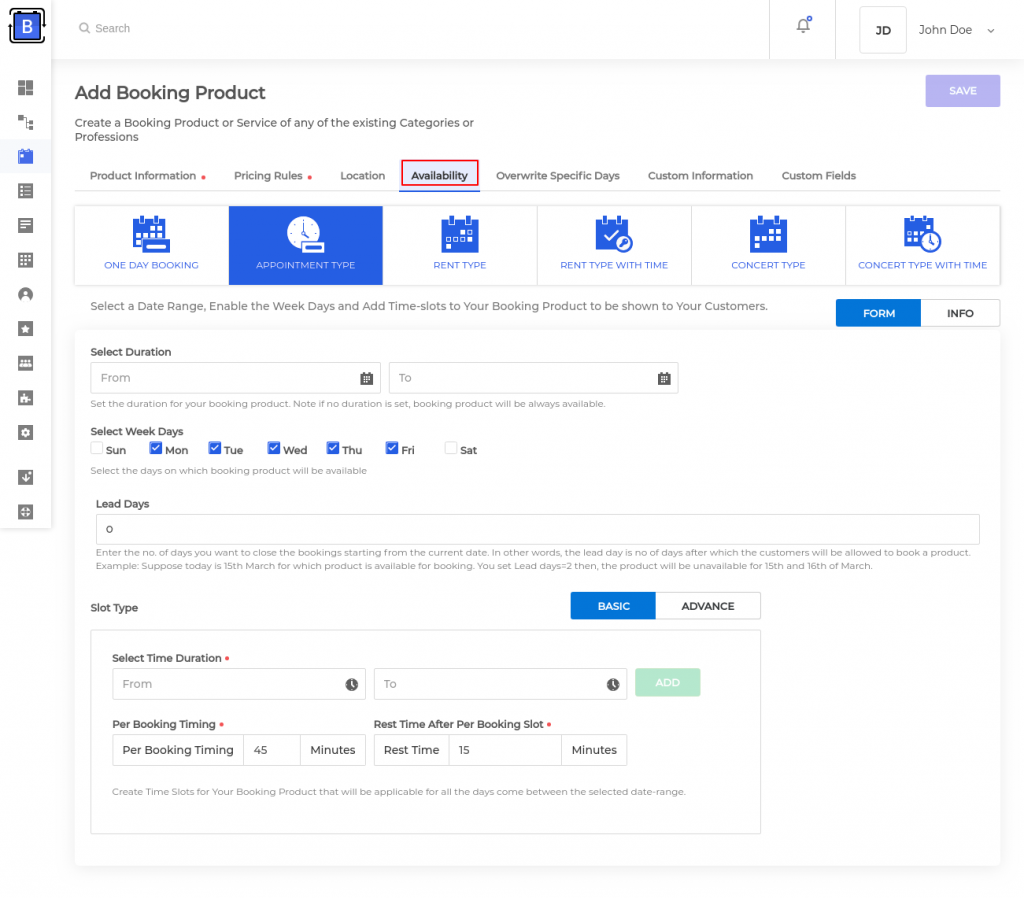
Availability: Select the booking type as Appointment Type and proceed to create time slots.
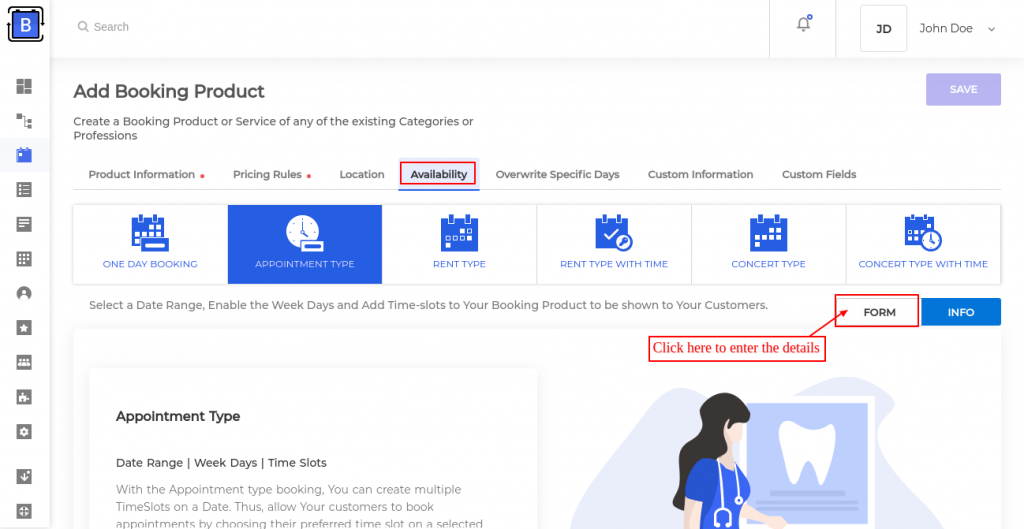
You need to select the duration when the booking service will be available.
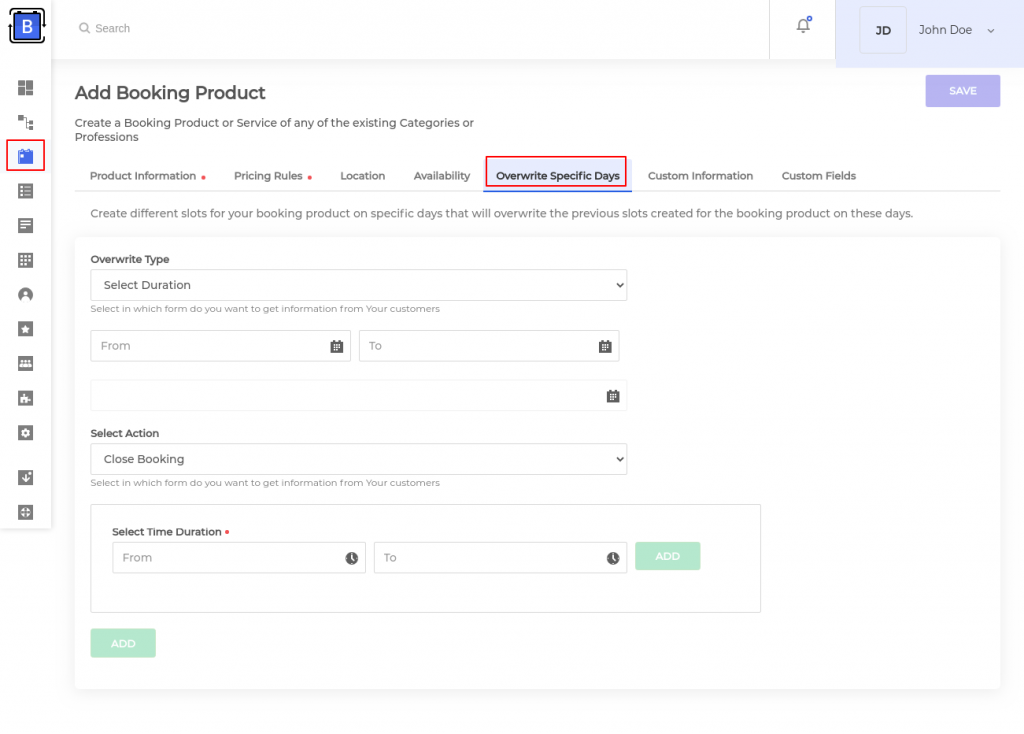
Overwrite Specific Days: You can now close bookings for the customers on some specific days or time duration that will overwrite the previous slots created for any booking product.
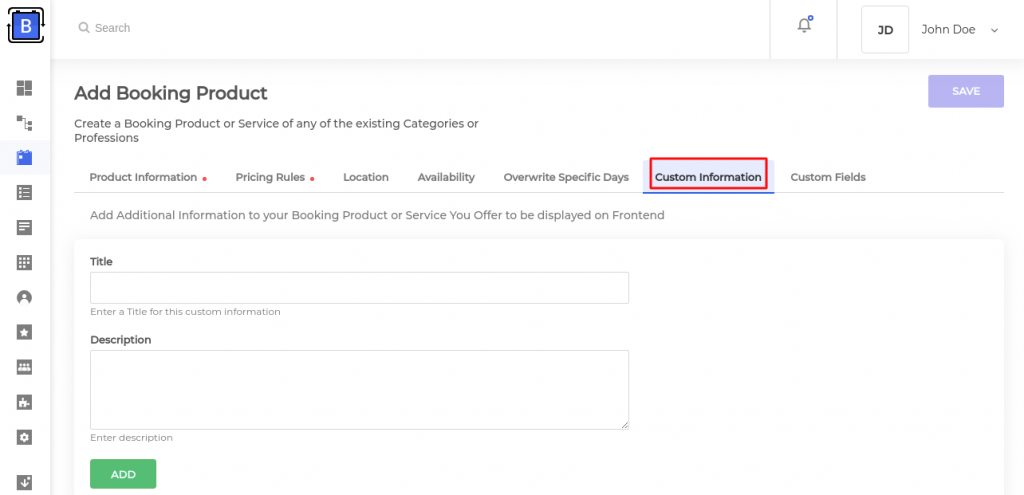
Custom Information: If you want to add some additional information about your booking product, you can add it to this section only. You just need to enter the title of the information that you are providing along with its description.
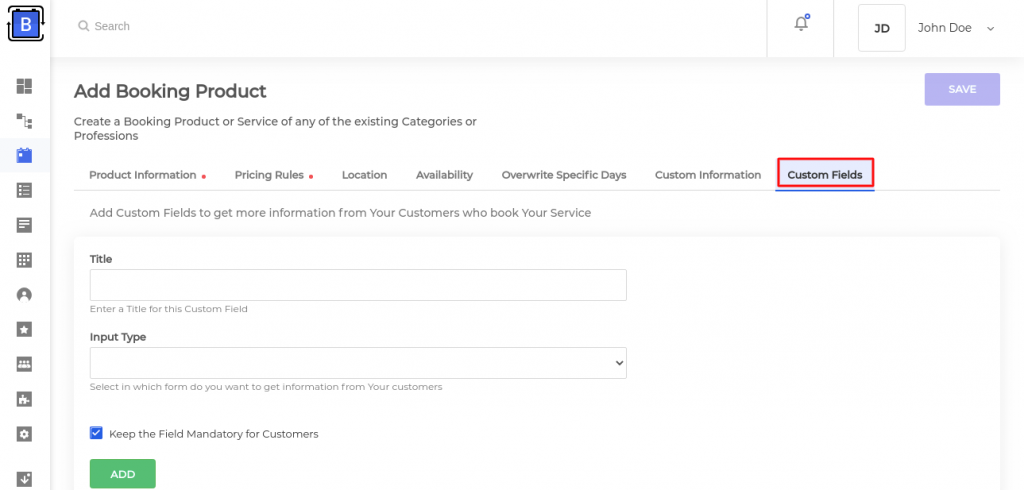
Custom Fields: In case you want some additional information from your customer, you can add custom fields with the booking products from this section.
Save the Changes. You are good to go now !!
Frontend Look
This is how the appointment type booking products will be available on your storefront:-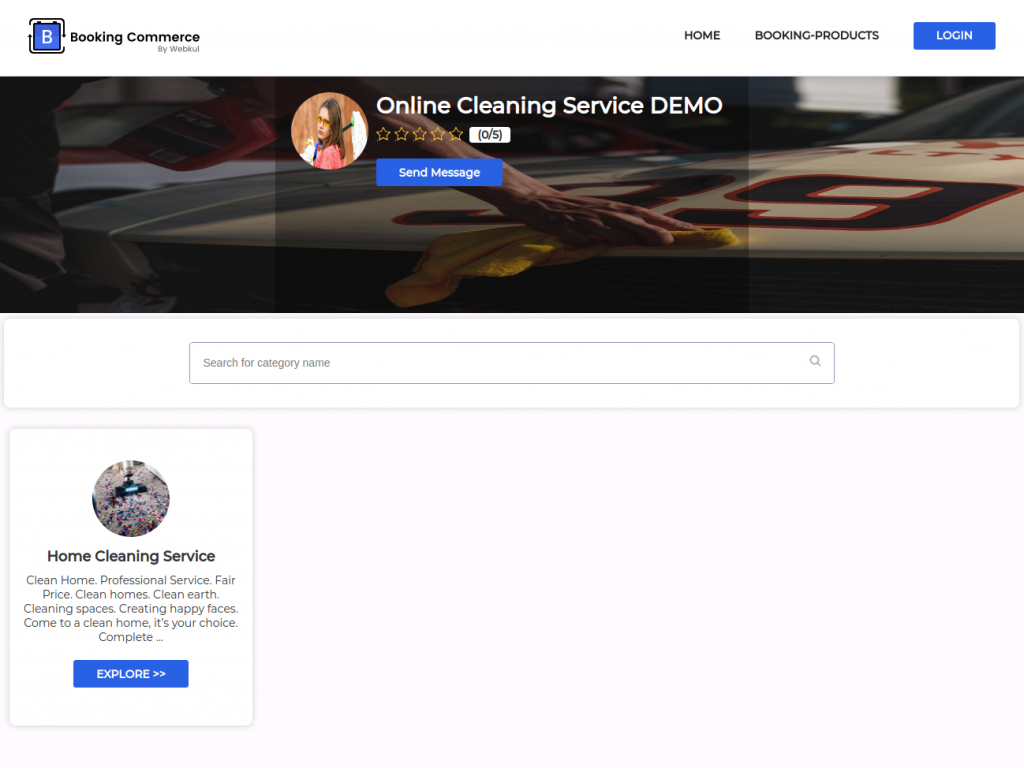
Booking product visibility:-
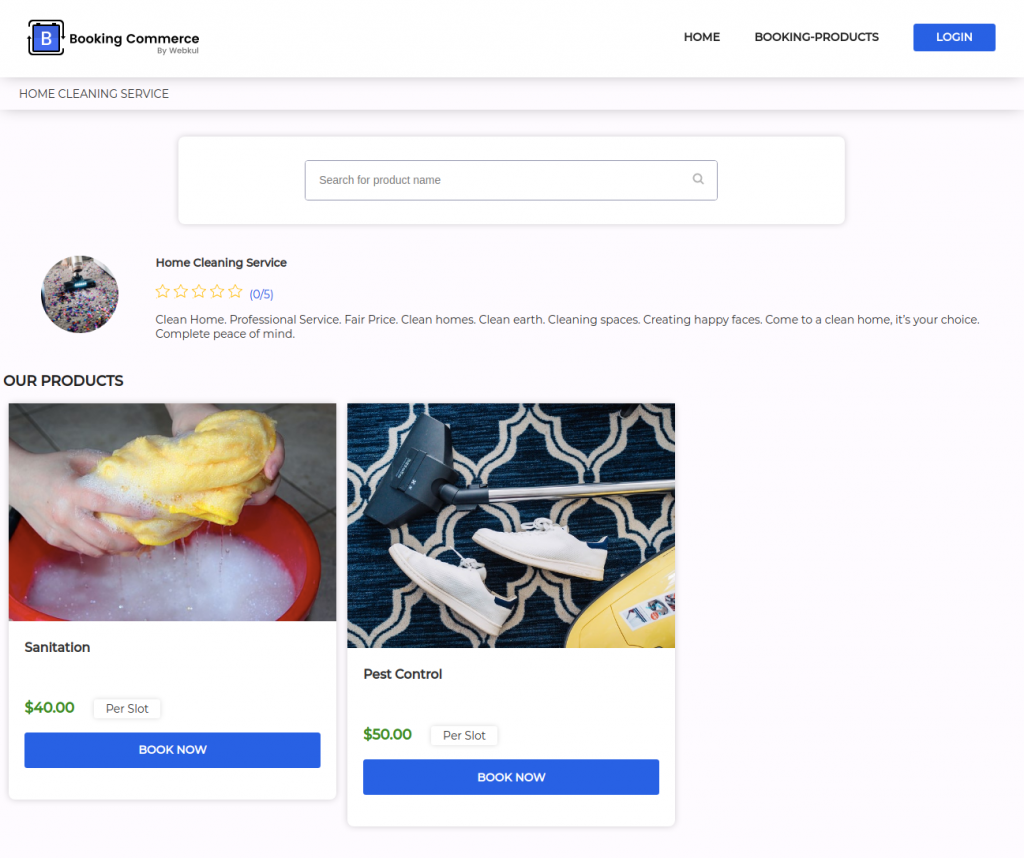
Customers can click the Book Now button and book the service of their choice.
Order
Once a booking is confirmed, an order will be created on the Booking Commerce admin panel. You can manage the bookings from there. You can also create bookings on behalf of customers.
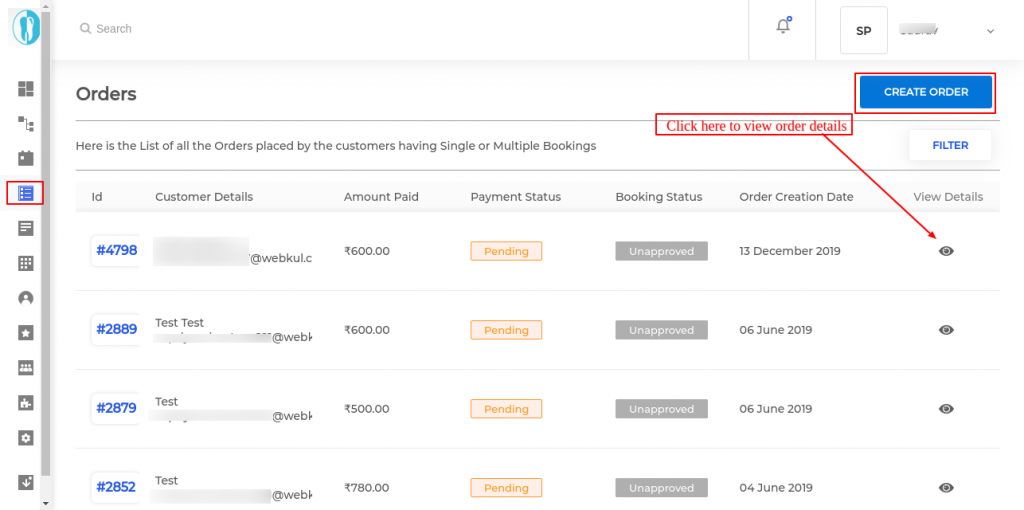
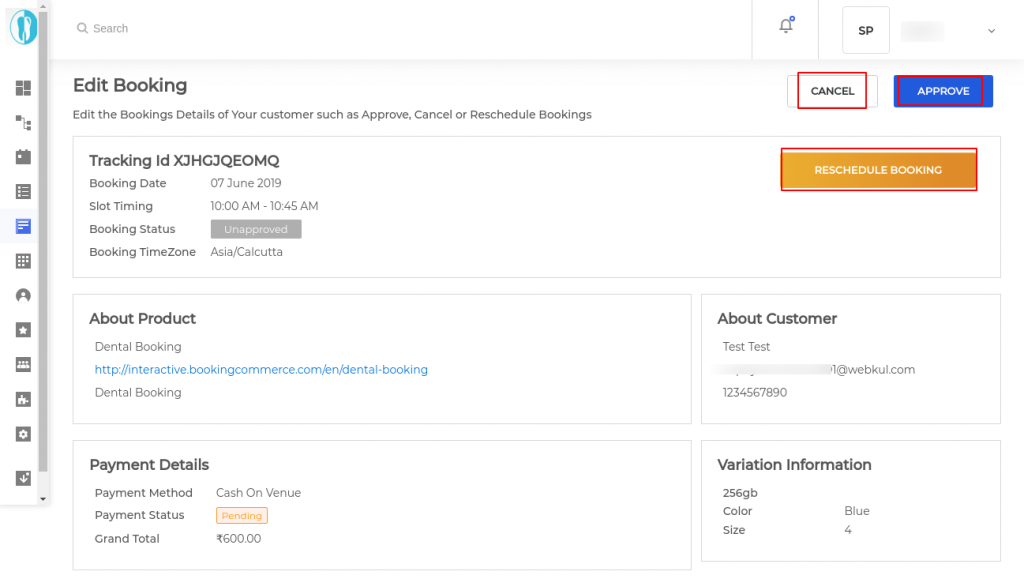
Now, click the Eye button to approve, cancel or reschedule bookings.
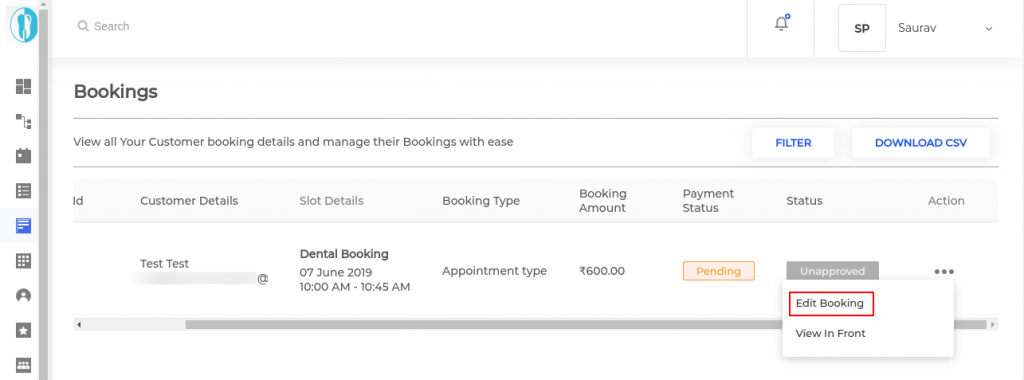
Click the Edit button and manage bookings:
Bookings
You will have the complete booking details of the customer in this section.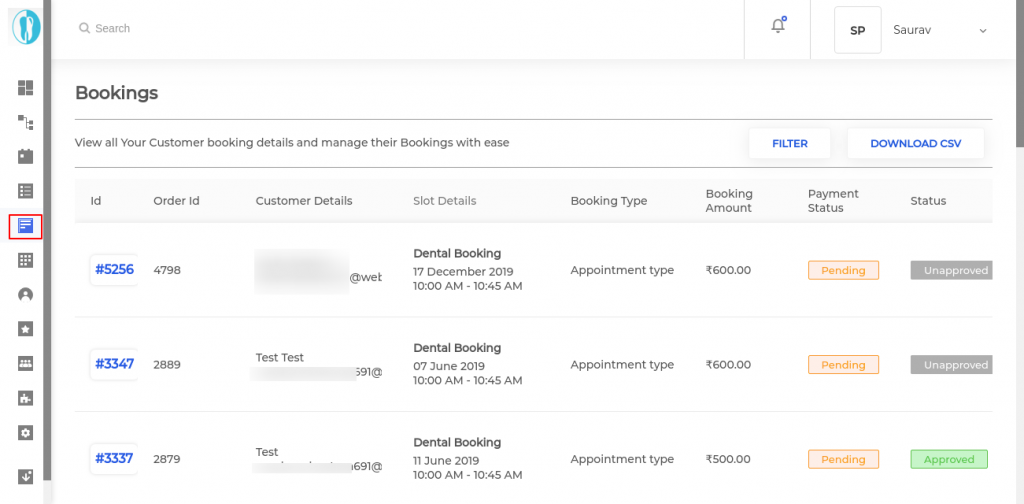
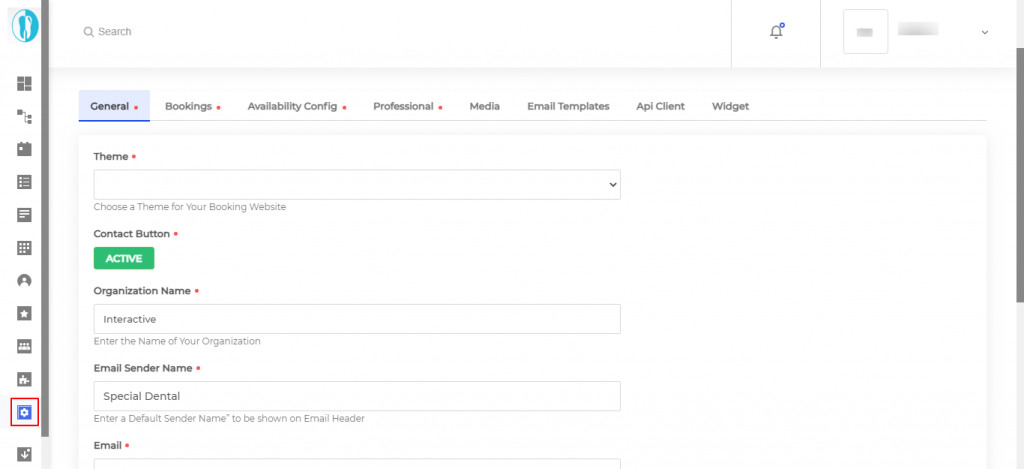
Configurations
You can configure booking details, availability, media icons, email templates from this section.
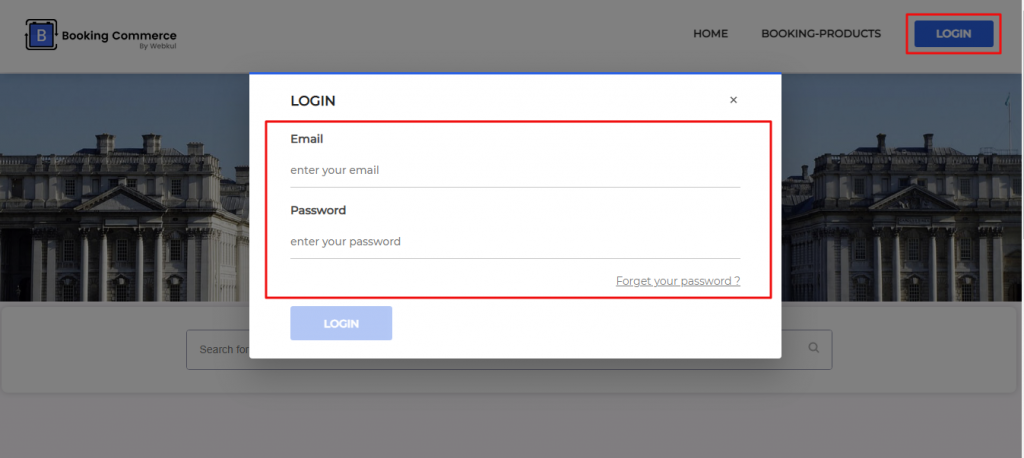
Customer End
The customer can login to the booking commerce panel and manage their bookings.
In case of any questions, connect via support@bookingcommerce.com
Thanks for reading !!!
Be the first to comment.